Introduction
After many months of procrastination I finally succumbed and ordered one of these tubes from Altair Astro. Ordering from them was hassle free and delivery was prompt.
This page presents my appraisal of the instrument and will evolve as my experience of its use grows.
This page presents my appraisal of the instrument and will evolve as my experience of its use grows.
First Impressions - Opening the Box
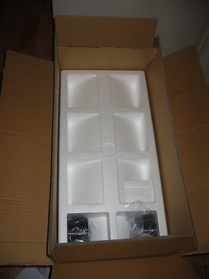
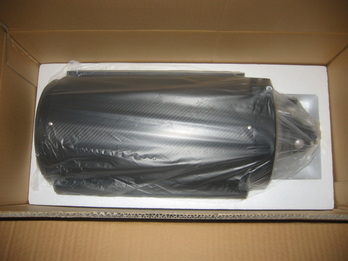
There’s nothing like getting a nice big box in the post. The scope arrived well protected in a double box and encased in a polystyrene sarcophagus.
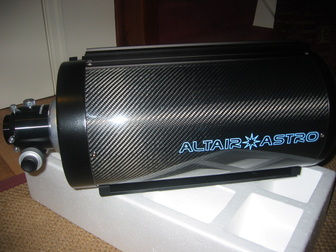
The overall fit and finish of the scope looks to be good, the carbon fibre tube looking particularly smart. I did notice on the photos that I took there were some marks around the secondary collimation screws, presumably caused during factory collimation, but I hadn’t noticed them during a visual inspection. It’s amazing what a flash gun shows up.
For mounting the scope and fitting a guide-scope, it has a Losmandy D series dovetail rail on the bottom and a Vixen dovetail rail on the top, which presumably you could swap over if required. There is also standard SkyWatcher type finder scope shoe. The front of the scope is protected when not in use by a dust cap which looks to have a secure push fit.
The scope has been designed to enable it to be used with a variety of imaging configurations and to this end it comes supplied with a set of extension tubes to provide the appropriate back-focus distance: one 2” and two 1” tubes are included.
The only minor gripe I have so far is that the scope did not come with any documentation, so details about how to collimate could have been problematic. Fortunately, manuals are available on the web for its sibling clones including Astro-Tech and Orion.
  |
  |
Focuser
The focuser is a GSO dual speed unit with a linear bearing and a 2” travel that has both a metric and an imperial scale. It has a tension screw on the underside and a lock screw on the top. The focuser can be rotated by loosening the large silver locking collar. It comes with the ubiquitous 2” to 1.25” adapter. The focuser looks to be quite solid and the overall quality I would describe as satisfactory – the operation is smooth enough and certainly not rough. My experience of other focusers is somewhat limited, but in comparison to the Crayford that came supplied on my IKI 70ED (another Chinese scope that is sold under many guises), the IKI focuser is decidedly of a better quality: more substantial and a smoother operation. I’m sure the focuser will be fine in practice though I’ve always planned to upgrade to something like a Moonlite at some stage in the future. One good thing about the focuser is that the 2” accessory holder has 2 thumbscrews, which is more reassuring than just the one provided on the IKI focuser.
 |
 |
Collimation
The initial collimation was checked using a Cheshire eyepiece. Some adjustments were necessary so I'm glad I had access to the user manuals for the other GSO RC scope variants. The secondary looked to be off to one side a little and also the optical axis wasn't quite concentric.
As this was the first time I'd adjusted collimation on this kind of scope, it took about half an hour to complete as I had to work out which way the optics moved when I adjusted particular screws. But following the instructions in the manuals I was able get both the optical axis and the secondary to a good level of initial collimation.
As this was the first time I'd adjusted collimation on this kind of scope, it took about half an hour to complete as I had to work out which way the optics moved when I adjusted particular screws. But following the instructions in the manuals I was able get both the optical axis and the secondary to a good level of initial collimation.
Conclusions
Overall my first brief impressions are favourable. It looks like it could be a great scope. Of course, the real proof of the pudding will be in the imaging but it looks like I’m going to have to put up with the obligatory wait for clear skies.
3 Months On
A brief update on use of the scope after about 3 months. Unfortunately due to a poor summer the scope hasn't got as much use as I'd hoped but now that autumn is upon us there have been a few more clear nights.
The scope has continued to impress. The images that I've managed to obtain are siginificantly better than what I've been able to achieve previously with my SCT - they won't win any awards but that's down to my personal level of expertise and practical circumstances rather than the scope itself. Some of the improvements in the imaging such as rounder stars may also be due to the use of off axis guiding rather than the piggy back guiding that I'd previously used. But the overall image field is clearly much flatter which is down to the optics of the scope.
I still haven't got perfect collimation but it's getting there. I can now get near quite quickly with the Cheshire eyepiece, I just need to master the final adjustments when out in the field.
I'm now very satisified with the stock focuser - it has performed admirably, so much so that I'm now no longer considering an upgrade. It should be noted that my imaging payload of QHY8 + Meade DSI1 + Orion OAG is a relatively light 1.25kg so doesn't place much demand on the focuser.
The only problem I've encountered is with the finder scope shoe. In its factory fitted setting it was impossible to get a finder scope to align with the main tube. In the end I had to wedge some shims under the shoe to tilt it forward enough to enable alignment to be achieved.
So far then, it has been money well spent.
