Garden Pier Construction
Background
Like a lot of amateur astronomers these days, I was keen to have a go at astrophotography. My first attempts were with the LX90 mounted alt-az on its tripod and unguided. Needless to say that results were poor, only
being able to manage about 8 second subs. Next I tried with the Meade wedge. Again I was not happy with the results. Due to the limited time I had available once I'd carted everything outside and connected it together, I had little time and little success with getting a decent polar alignment.
A permanent observatory was not feasible in the garden, however I had seen examples on the web of other astronomers constructing a fixed pier in the garden. This meant that a good, permanent polar alignment could be achieved, with the scope just needing to be attached to the pier for each session. This scenario was ideal for my circumstances, so I set about this project.
The Pier
The first requirement was of course to obtain a pier. I decided against forming a concrete pier, as the ultimate plan was to move to a house where a proper observatory could be set up and I wanted therefore to leave a
minimal footprint in the garden. Instead I decided on a steel pier which could be taken with us when we moved. I started pricing up commercial piers, all of which seemed to be in the region of £500. I also thought about getting a local steel fabricator to manufacture one so I began to draw up a specification.
However I was fortunate to come across a second hand Pier Tech 1 pier at a very reasonable price. Furthermore the seller was able to supply me with a top plate and all the bolts to fit it to the PierTech.
Construction
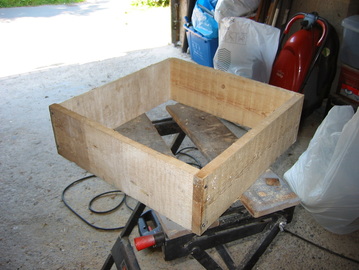
31/05/2009: Construction of the plinth shuttering. Made from pieces of scrap wood from a pallet and is approximately 18" square and 4" deep.
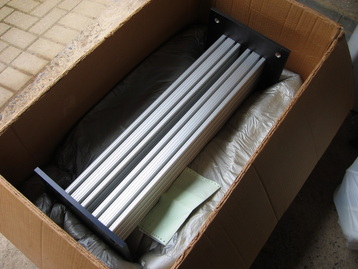
21/06/2009: Picked up pier and top plate.
28/06/2009: Drilled holes in the top plate for the wedge. Constructed an azimuth
adjustment mechanism.
Drilled hole in top plate to accommodate the adjuster.
adjustment mechanism.
Drilled hole in top plate to accommodate the adjuster.
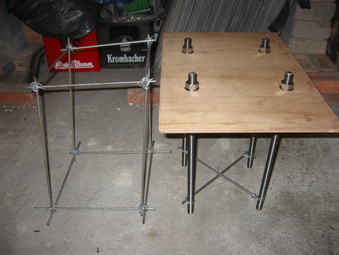
04/07/2009: Tapped top plate hole for affixing the wedge to accept an M12 bolt. Cut threaded studs to size and constructed a basic rebar reinforcement cage for the bottom of the pier foundation. Fitted the threaded studs onto a plywood template and added rebar struts at the bottom of the studs.
18/07/2009: Dug hole for pier plinth and placed rebar cage at the bottom. Hole is 18" square and almost 3 ft deep. Hit bedrock just before 3ft. Filled hole with with concrete. Inserted the studs with the template.
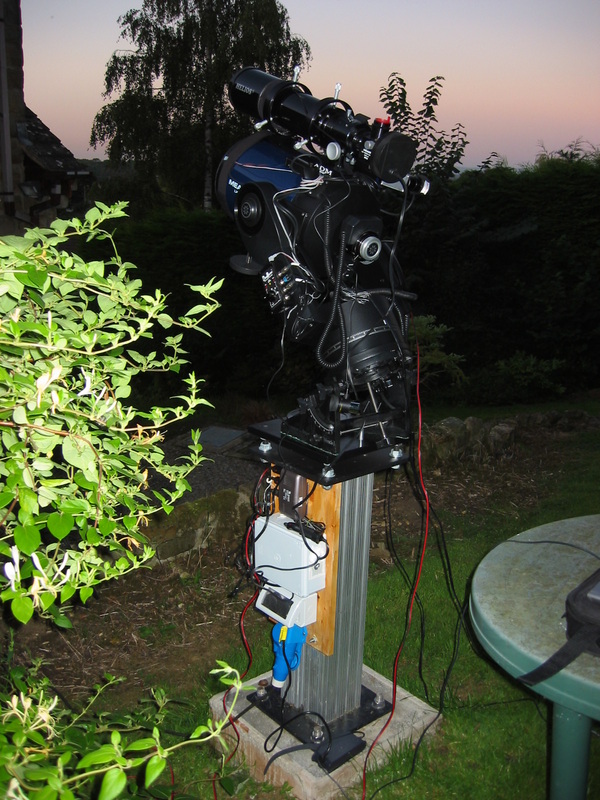
02/08/2009: Bolted it all together. Protected with Telegizmos 365 Cover.
13/09/2009: Fitted an electrical services panel to the side of the pier, which includes:
- Caravan hook-up style socket to connect mains cable from the house
- Weatherproof dual mains socket (to supply power to the 12V PSU and Laptop)
- 12V 6A PSU, housed in weatherproof enclosure
- 4 way 12V cigarette lighter sockets
Final Configuration
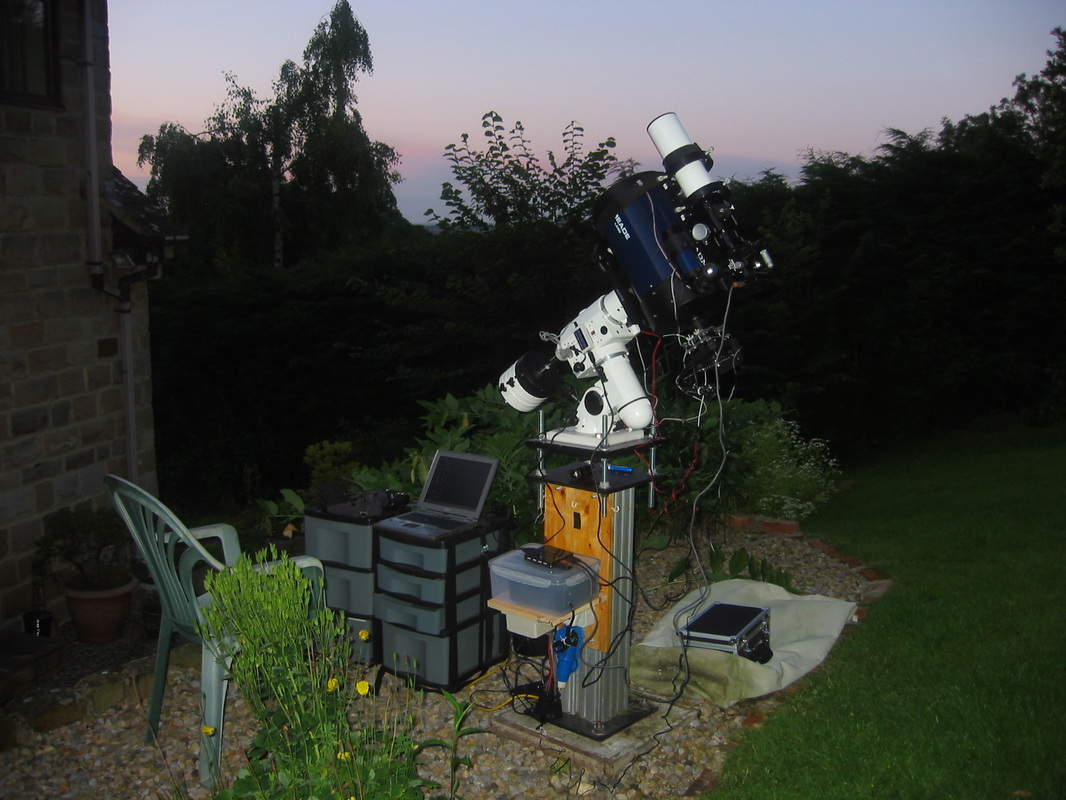
Pier top modified for an EQ6 mount and drop down shelf added for a beefed up power supply.
